This guide explains how to set up a Peplink Balance 20 dual WAN router with public IP addresses on one of the two WAN inputs. In my system I use a block of 5 IP addresses supplied by AT&T (U-verse) but these instructions apply to any publicly addressable block of static IP addresses assigned by your ISP.
This article is related to another on this site: 'How to set up your AT&T static IP account with the NVG589 Gateway and your own router'. This guide is intended specifically for owners of the Peplink Balance 20 router but may be useful to those with other Peplink models and possibly to other routers as well.
Your ISP will probably give you a gateway IP address, a useable range of IP addresses, and a netmask. We will use these (bogus) example values in this document:
| Broadcast Address: | xx.xx.xx.39 |
| Gateway IP Address: | xx.xx.xx.38 |
| Useable IP range: | xx.xx.xx.33-37 |
| Subnet IP: | xx.xx.xx.32 |
| Netmask: | 255.255.255.248 |
Note that in our example, it takes 8 IP addresses for you to have 5 useable IPs! We won't be using the 'Subnet IP' and 'Broadcast Address' associated with our example block and your ISP probably won't give them to you for your own account. For details about your own (or any other!) subnet, visit this online subnet calculator, and enter the gateway and netmask values given to you by AT&T into the 'IP Address' and 'Subnet Mask' fields. (Network Engineers please feel free to jump in and correct or elucidate as necessary...)
If, as in my case, you must use a gateway instead of a modem, this information allows you to configure your gateway so that it will deliver your IP block to your router. Again, refer to my article linked above for these details.
All of our work will take place on the Network->WAN form on your Peplink. We will leave most settings at their default values, so I will only discuss the important ones.
Select your new WAN interface and go to the Connection Settings form. Give your connection a simple, descriptive name in the 'WAN Connection Name' field. For obvious reasons, I used 'AT&T U-verse' here.
Select 'Static IP' as the 'Connection Method'.
You will want to specifiy the upload and download bandwidths later, after you've had a chance to run a good ISP speed test to determine what rates you are able to achieve with your system. The router will use these values to help prioritize and allocate traffic if you have two WAN inputs.
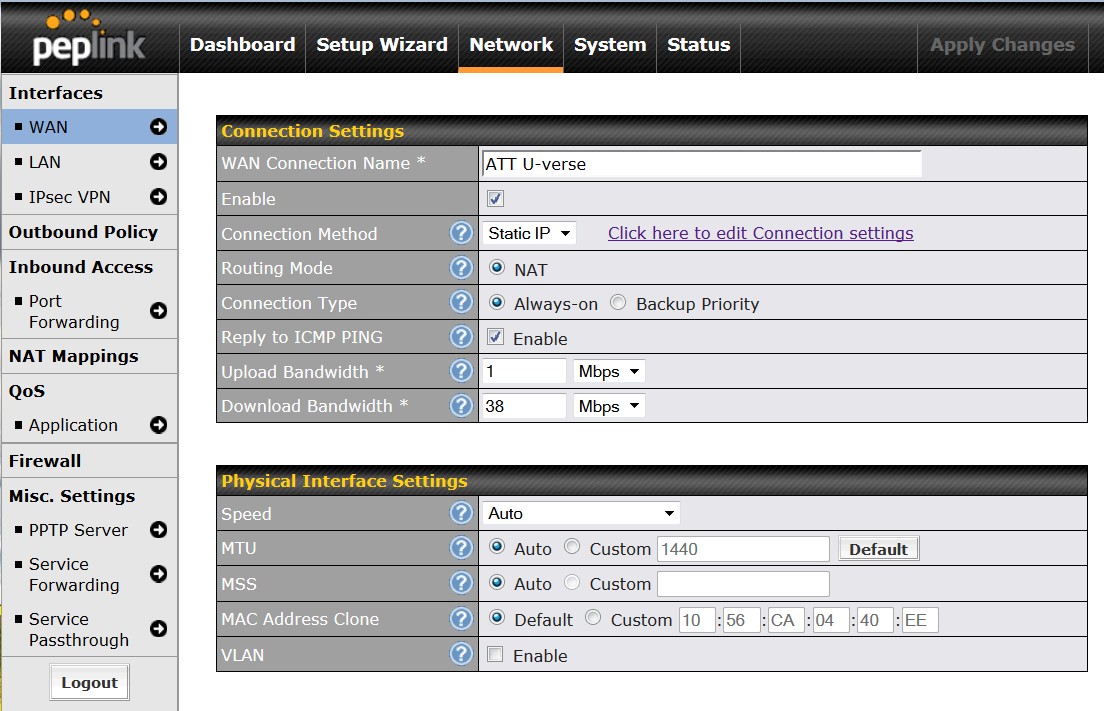
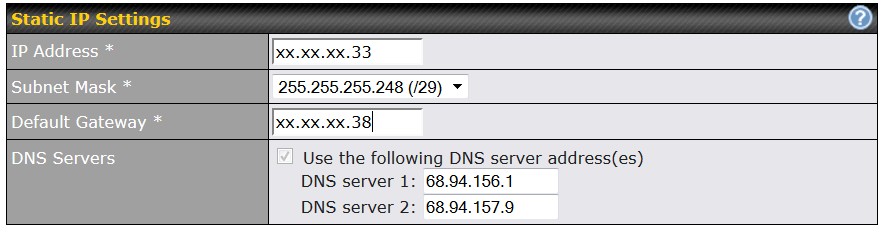
Enter the IP Address, Subnet Mask, Default Gateway, and DNS Servers on the 'Static IP Settings' form. Your ISP should have provided you with DNS servers; these values are correct for AT&T.
AT&T U-verse users, make sure the 'Public IPv4 Address' of your NVG589 gateway matches the 'Default Gateway' you enter on this form, and enter the lowest IP in the NVG589 DHCP range as the 'IP Address'. Owners of other modems or gateways will need to insure their devices are configured similarly. The table below will hopefully clarify the relationships among the settings between the two devices.
| NVG589 | IP/Netmask | Peplink Balance 20 | |
| Public IPv4 Address | xx.xx.xx.38 | Default Gateway | |
| DHCPv4 Start Address | xx.xx.xx.33 | IP Address | Available to your LAN hosts/servers |
| xx.xx.xx.34 | Available to your LAN hosts/servers | ||
| xx.xx.xx.35 | Available to your LAN hosts/servers | ||
| xx.xx.xx.36 | Available to your LAN hosts/servers | ||
| DHCPv4 End Address | xx.xx.xx.37 | Available to your LAN hosts/servers | |
| Public Subnet Mask | 255.255.255.248 | ||
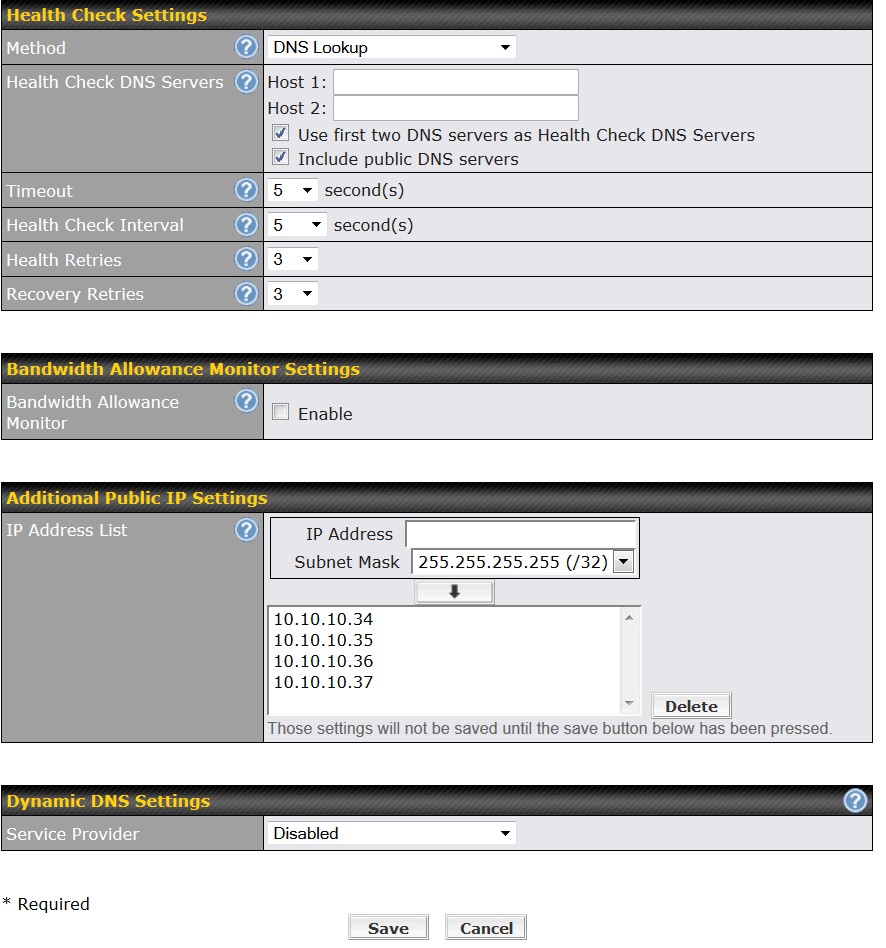
The 'Static IP Settings' form above provides for a single IP adddress. To access the rest of your public IP addresses you must specify them on this form.
Note that in this example I've used 10.10.10.34-37 instead of xx.xx.xx.34-37 because the Peplink won't allow you to enter bogus IP addresses! In any case, this last step allows our Peplink to route all 5 of the addresses in our example block: xx.xx.xx.33-37
Save and apply your changes, and you should now be able to use your public IP addresses via NAT, port forwarding, etc.
Good luck, and I hope these instructions have helped!
Comments, corrections, questions? Email me here:
![]()